Photo courtesy of the Prosser Chamber of Commerce in Washington's Yakima Valley—home to 15 wineries producing notable reds to match with your chocolates. In fact, each Presidents Day Weekend, the wineries offer complimentary chocolate desserts in their tasting rooms.
|
KAREN HOCHMAN is Editorial Director of THE NIBBLE.
|
|
February 2005
|
|
Conduct Your Own Chocolate Tasting
What’s More Fun Than A Party To Taste
Chocolate & Wine?
What good is sitting along in your room, even with several box of chocolate and a few bottles of wine? We NIBBLE editors have done it more than a few times—it’s a long, lonely night but it’s part of our job. You, on the other hand, can be surrounded by friends who will talk about your event for years, by hosting a chocolate and wine pairing.
We’ve done all the planning for you. Just follow the steps below and a week from today you could be listing to the pairs singing at your own chocolate and wine cabaret.
Setting Up
Step 1: The Menu
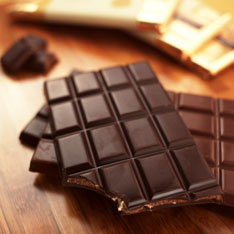
- After reviewing our article on Pairing Chocolate and Wine, think about what you’d like to serve at your first party. We think the best way to start evaluating pairings is to start with plain bar chocolates—bittersweet, dark, milk, and white—and a dozen wines.
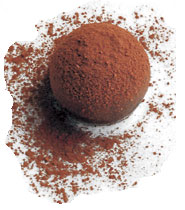
- A more festive approach is to try different flavored truffles and bonbons and contrast wines with the different fillings—classic chocolate ganache (chocolate and cream), praline (ground nuts), and fruit-accented ganache or fondant (bonbon filling).
- The biggest challenge for both you and your guests is to group chocolates by category—plain bar, fancy bar, fruit-filled, mint-filled, enrobed nuts, caramels, and toffee or buttercrunch.
- Plan to taste up to 12 pieces of chocolate and 12 wines. Check out some of our favorite chocolates to try at your tasting, or ask for recommendations at your local chocolate store. After you’ve selected your chocolate, use our wine pairing chart and work with your wine merchant to find the best assortment of wines in your budget range that will let you compare and contrast.
Step 2: The Setting
- Decide when you want to hold the tasting. The best times are mid-afternoon or mid-evening. The timing should be one to two hours after you’ve had lunch or dinner and are no longer hungry, but have had ample time to digest and are ready to taste.
- Assess available facilities. You’ll need a table large enough so that everyone can have a space for wine glasses, a plate of chocolate, and a rating sheet. If you have a choice, a rectangular table works better than a circular table.
- The room should be bright enough so that participants can enjoy the visual nuances of the chocolate and wine as well as the flavors and aromas.
Step 3: The Invitation
- Plan your guest list. A group of six to eight is a good basic size for interaction and discussion; although if your guests are experienced wine tasters and you have room at the table, a dozen can work. With a larger group, be prepared to direct the discussion by asking someone to lead off with comments.
|
|
- If your goal is to learn about pairing chocolate and wine, then invite people who are like-minded. It’s fun, but it also takes concentration. Those who don’t really have an interest in exploring flavor nuances—who just want to drink wine or eat chocolate and have social conversations—are better invited to a different event where the agenda is only social.
- You can mail invitations (we’ve bought greeting cards with photos of sumptuous chocolates on the cover and blank insides); or create your own e-mail invitations. Remind your guests to ideally finish lunch or dinner two hours before they arrive for the tasting.
Step 4: The Preparation
- Create a sheet for notes. Set up a table on an 8½" x 11" page horizontally with ½" margins. You will need 4 columns and as many rows as the chocolates and wines you are tasting, plus a “header” row. The headers of the columns from left to right are: Products, Appearance/Aroma, Taste, Comments. In the first column, make a row for each of the products to be tasted, and number each row, so you can refer back to “chocolate number 3.” Allow enough width in each row for people to write notes. If you are tasting a dozen of chocolates and/or pairings, your table may continue to three sheets.
- Prepare a tasting template. At professional tastings, templates are pre-printed on paper place mats instructing tasters and servers where to place item number one, item number two, etc. If you have access to a printer that uses 11" x 17" paper and are handy with a design program, you can create one. Otherwise, you’ll have to devise your own system to keep track of the chocolates and wines. One way is to line up two rows of glasses with the chocolate in front of each. If you’re tasting chocolate only, you can put them on a plate starting clockwise at 12, which enables everyone to be in sync when you say, “Let’s move on to chocolate number 3”; and to refer back to their notes sheet.
- It’s also helpful to prepare a sources sheet so everyone can have a record of the chocolates and wines they are tasting. Include the places where the products can be purchased, and the prices. Distribute this after everything has been tasted, since prices can color perception of the products. (So can names, which is why we prefer blind tastings, knowing products only as “chocolate number three” and “Port number 1” until after the tasting.
- Select palate cleansers. In addition to water, to cleanse the palate between comparisons you should have a supply of water biscuits like Carr’s or other bland, salt-free crackers. Unsalted matzoh is essentially the same product as water biscuits; most grocery stores carry unsalted Saltines. Baguette and plain white bread work, but are more filling. Strange as it may sound, a tart green apple like Granny Smith works. Cut it in very thin slices so people don’t fill up. After consuming the palate cleanser, complete the process by drinking some water or seltzer (not club soda—it has salt).
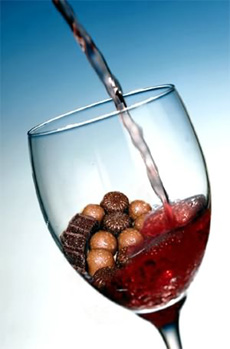
- A snifter or container of unground coffee beans is helpful to clear aromas from the nose (90% of taste is smell).
- On the day of the event, set the table. Each guest needs a water glass, at least 4 wine glasses, a sharp knife for slicing chocolate if you’re serving truffles or bonbons that can be cut in half, an evaluation sheet, and a pen or pencil. Wine glasses should always be clear so you can see the color of the wine. If you don’t have enough glasses, get 8-ounce hard plastic beverage cups.
- You’ll also need to set the table with napkins, a pitcher of water to refill glasses, and, if people won’t have a separate glass for each wine, a “dump bucket” so wine not consumed can be tossed to make way for new wines. An extra pitcher or a vase can be used for this purpose. Whatever you use, be sure it’s deep enough so that when you carry it to the sink to dump out, wine doesn’t slosh over the side.
- Now you’re ready to prepare a plate of chocolate for each guest. Use large dinner plates or chargers. They don’t have to be white—as long as the beauty of the chocolate isn’t lost, you can use colors, and mix and match for a festive look.
-
If you’re serving individual pieces of chocolate like truffles or bonbons, each guest should have one piece. If you are serving bar chocolate, divide the bar so that each guest gets the equivalent of 2 ounces.
Step 3: The Invitation
- Plan your guest list. A group of six to eight is a good basic size for interaction and discussion; although if your guests are experienced wine tasters and you have room at the table, a dozen can work. With a larger group, be prepared to direct the discussion by asking someone to lead off with comments.
- In any tasting, start with the mild tastes and conclude with the stronger ones. If you do the reverse, your palate is conditioned to the stronger tastes and when the more delicate tastes are presented, they pale in comparison.
|
|
- You or one of your guests may wish to act as sommelier and pour all of the wines; or if the group is small, you can pass the bottle around the table. Each person should get a pour of about 1/3 glass (3 ounces). You can get about 12 pours from a bottle of wine.
- You should pour the wine in flights of three or four wines at a time. Depending on what you’re serving, they would be poured in this order (as with chocolate, from the mildest to the most robust): champagnes, then white wines, then light and medium reds, then robust reds, then dessert wines.
- If you are tasting a number of different wines and don’t own (or want to rent) many glasses, consider buying plastic tumblers. People can drink their wines from regular stemware, but save their extra wine in a plastic cup instead of dumping it. This enables everyone to keep all of their wines throughout the tasting, referring back to earlier wines to make comparisons.
- Start with the white chocolates or; if you’re not tasting white, with the milk chocolates; and with the champagnes and white wines. Move to the light and medium reds when you are still tasting milk chocolate; and build to the dark and bittersweet chocolates with, robust red wines and ports.
Step 6: The Process
- Take half of the piece of chocolate. Look at the color and smell the aroma. Take a bite. Chew it slowly and note how it feels. Read more about this process in our article, How To Taste Chocolate, and see The Flavors & Aromas of Chocolate. Take notes.
- Take a bite of the chocolate. Chew it several times and let it slowly melt on the tongue. Is it smooth, velvety, creamy, soft or gritty? It should not be waxy or hard to melt. Savor the chocolate—roll it around on the tongue to taste the many flavors. (The tip of the tongue senses sweetness, the front sides sense sour flavors, the back sides of the tongue taste salty flavors, and the very back of the tongue detects bitter notes.)
- Swirl the wine in the glass and sniff the aroma (the “nose”). Note the scents. Take a sip and swirl it in your mouth so it blends with the chocolate. How does it impact the chocolate flavors?
- Cleanse the palate by eating an unsalted cracker and taking several sips of water. Take another bite of chocolate and try a different wine. How is this pairing different from the prior ones?
- Repeat this process until you have gone around the plate. Then discuss conclusions and vote for your favorite pairings.
And Then...
There are so many different pairings to explore. Bars today, truffles tomorrow, nuts next month. Get together a tasting group: every month someone else can plan and host. You’ll be the envy of everyone else in town.
|