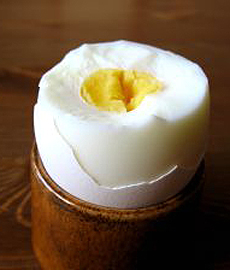

You need a bit of instruction to produce an incredible, edible hard-boiled egg. Photo by Pontus Edenberg | SXC.
November 2007
Last updated March 2018
|
 |
The Perfect Hard-Boiled Egg (Really, A Hard-Cooked Egg)
Here’s The “Recipe” To Make Hard Boiled Eggs
Plus Egg Nutrition & Egg Facts
Introduction
If you’re frustrated because something as seemingly simple as cooking hard-boiled eggs doesn’t produce that perfect product, here is the egg-cellent solution.
First, though, we need to set the record straight. The correct term is hard-cooked egg, not hard-boiled. Why? According to the American Egg Board: Although the cooking water must come to a full boil, the pan is immediately removed from the heat so that the eggs cook gently in the hot—not boiling–water. If they were to boil throughout the cooking process, you’d get rubbery eggs.
Egg-Cellent Cooking Technique
Start with fresh eggs. However, don’t use farm-fresh eggs: They need to be at least three days old to peel well. Here’s a simple test for freshness: A fresh egg will sink in a bowl of water. Raw eggs that float in the water are over the hill for boiling, so make scrambled eggs or an omelet (assuming the eggs look and smell O.K. when you break them). Don’t bake with old eggs, either. By the way, commercially-produced eggs are washed before packing, and do not need to be washed again in the kitchen.
Don’t overcook. That generates the green ring around the yolk, which is a reaction between the iron in the egg yolk and the sulfur in the egg white. Heat abets the reaction, so the longer the eggs cook, the greater the chance of discoloration. Overcooked eggs are also are harder to peel.
The ideal technique. For easy-to-peel eggs with beautiful yellow centers:
- Choose the right size pot, so you only have one layer of eggs, or they may not cook evenly.
- Bring the eggs to room temperature before using (20 to 30 minutes out of the refrigerator). Place the eggs in a pot of cold water, covering the eggs by 2 inches. Add a teaspoon of salt, and bring the water slowly just to boiling. (A rapid boil makes the whites tough and can cause the eggs to knock against each other and crack.)
- Immediately remove the pot from heat and cover the pot with a tight lid. Let the eggs sit in the hot water: 12 minutes for medium eggs, 15 minutes for large eggs, 18 minutes for extra large eggs, 20 minutes for jumbo eggs).
- Drain and immediately place eggs in a bowl of ice water until completely cooled. (Cooling them under cold running water is not environmentally-friendly alternative.)
- You can then refrigerate the eggs in their shells, or crack and peel them. Crack under running water, starting at the large end. Try to grab the membrane under the shell: It can help you remove large segments at a time. You should have beautiful eggs.
A hard cooked egg can safely be refrigerated for up to one week. If you hard-cook a dozen eggs on Sunday, you’ll have a week’s worth of grab-and-go, high-quality protein breakfasts or snacks. What’s left the following Saturday can become egg or egg salad sandwiches, or go into a chef salad, spinach salad or numerous other lunch options.
For Soft-Boiled Eggs
- For soft whites, soft yolks:
Large Egg: 4 to 5 minutes
Extra-Large Egg: 5 minutes
- For hard whites, soft yolks:
Large Egg: 5 minutes
Extra-Large Egg: 6 minutes
Remove from heat, cover with cold water before peeling per instructions above. Cooking times are based on room-temperature eggs. Times will vary based on altitude, but use these as a base and adjust accordingly.

|  |
|


