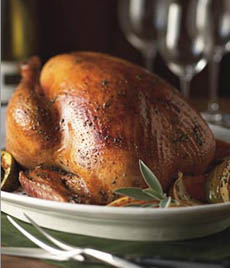
If you want to use your rotisserie for poultry, stick to chicken and avoid duck. Photo courtesy Butterball.
|
ERIC DANTIS is a professional chef in residence at THE NIBBLE’s test kitchen.
|
|
April 2010
|
 |
Vertical Rotisserie
Page 2: Rotisserie Cooking Is Easy!
This is Page 2 of a four-page review of the Cuisinart Vertical Rotisserie and rotisserie cooking. Click on the black links below to visit the other pages.
Using The Vertical Rotisserie
Having never used a rotisserie before, I was a bit intimidated and even apprehensive. As a chef trained in more traditional methods of cooking, I already had my prejudices.
After reading through the instructions and going through the motions, however, I found myself pleasantly surprised with the ease and convenience of the appliance.
Start With Trussing The Bird
The first step you should take is to season and then truss the bird. Trussing involves tying or securing meat (for example, with silicone cooking bands) into a tight bundle for even cooking.
There are countless ways to truss a bird, but no matter which method you choose, the most important aspects are to have the butcher’s twine (also called butcher’s string) tied securely, and for the end product be in a tight, neat package. |
|

Trussing with a string or band should at least pull the two legs together while roasting and close the cavity. Photo courtesy CherryValley.co.uk. |
Trussing Instructions
To truss any bird:
- Measure a piece of butcher’s twine so it’s 2 to 3 times the length of the bird.
- Lay the bird vertically in front of you on a cutting board with the breasts facing upward, and place the middle of the length of the string under the tail.
- Bring the ends of the string upwards and around the outside of the ends of the legs, and cross the string at the middle of the bird.
- Wrap the string around the end of each opposite leg to make a figure eight around the tips of the legs. Tighten the legs together. (The legs should come together, and if you did it right, the cavity will be closed.)
- Bring both ends of the string around to the front of the chicken (the string will run past the thighs). Notice that the breast have plumped and the legs should be tight to the body as you bring the string towards the neck.
- Tie a double knot, surgeon’s knot or slip knot around the neck to anchor the truss.
Note that there are several variations that can be used to truss a bird, but the most important aspect to remember is that the bird needs to be held tightly together so it will cook more evenly and come out juicy.
Roasting Instructions
After the bird has been trussed:
- Place it on the poultry spit in the rotisserie oven, set the time and temperature and hit the start button.
- You can watch through the window as the chicken slowly rotates around the heating plate.
The bright interior light that switches on and off was extremely useful in watching the bird develop its golden brownness, although using a probe or an instant read thermometer is the most accurate way of judging doneness.
The recipe book that is included is helpful not only to give you recipe ideas, but also for outlining an average amount of time you will need to cook your food if you have never used a rotisserie machine before. Our chickens were done much faster than the time the book specified, by between 10 to 15 minutes.
Continue To Page 3: Cooking Duck In A Rotisserie
Go To The Article Index Above
© Copyright 2005-
2026
Lifestyle Direct, Inc. All rights reserved. Images are the copyright of their respective owners.
|

